

What do strange dogs pooping in your yard and the way some people are responding to Covid-19 have in common? Both are undesirable behaviors that can be hard to detect and correct – until now. Applying the phrase, “with conflict comes creativity,” we got creative and designed and deployed an efficient and powerful ML/AI solution for detecting and correcting problems like these.
One night I had walked down the hill in the dark to fetch our garbage cans. About 30 minutes later I began getting that familiar whiff. You’ve been there, right? I had stepped in dog poop. Coincidentally, we had recently acquired a pair of AWS DeepLens cameras, essentially a development kit to explore machine learning through computer vision. Now I had the conflict, and the resources to get creative.
Introduction
Inspired by my recent Faux-paw, I set about to solve this problem with technology. You can imagine the look on my engineer’s face when I told him he was going to spend the next day training a computer model based on images of pooping dogs. As it turns out, you can find just about anything in Google Image Search, and this was no exception.
As I began to talk openly about our project in the business community (and received a variety of questioning glances), my friend Doug Erickson became animated and proclaimed : “I totally need that!”, referring to a rivalry with one of his neighbors. With product market fit established, The Poopinator™ was born.
Detecting bad behavior would not be enough, we would need a correction mechanism. After pondering several solutions, including an air powered truck horn, we decided to leverage a more humane technology that already existed in these problem locations – the sprinkler system.
SageMaker
For the uninitiated, SageMaker is a collection of tools AWS provides to enable geeks like us to do geek stuff like training computer models. Those tools include :
- Labeling (Ground Truth)
- Notebooks (Jupyter)
- Training
- Inference
While this article is meant to appeal to both technical and non-technical folks, you can learn more about AWS SageMaker here, and feel free to skip to the following sections.
Ground Truth
The first step in building a computer vision model is “labeling” the images using AWS Ground Truth. That is to say you use sample images of objects in order to train the model what you want it to detect. In the case of our canine friends, we had a constraint of only detecting a dog when they were in the act. So we set out to procure images of dogs who were pooping (and not pooping), then draw “bounding boxes” around the dogs.

Once you painstakingly label the images (it’s not really that hard), Sagemaker produces a manifest file which you will feed into your “training” job. But in order to do this, you need to create a Jupyter Notebook, which is kinda like a page in a Wiki, but it allows you to add and execute computer code such as Python.
For those of you who are new to Jupyter, there are plenty of example notebooks available in SageMaker that you can modify. If you want the sordid technical details, just click the “Deep Dive” buttons throughout the article.
Jupyter Deep DiveHere we dive into the details of the SageMaker Notebook for the Poopinator. In the interest of providing clean code, we start with a number of variable declarations. We also copy our source images from the S3 bucket from our labeling job.
After the labeling job is complete we can review the results to verify the images were labeled correctly. Let’s get the labeling job manifest and copy it to out notebook.
Next we plot the annotated images. We display the images from the notebook and draw the bounding boxes from the labeling job on top of them.
Now let’s read the augmented manifest line by line and display the first 10 images with annotations and bounding boxes.


Training The Model
With all of the busy work completed in our notebook, we then launched a training job. With 221 images in our dataset, it took SageMaker just under an hour to train our model using a ml.p2.xlarge instance. In our first attempt we had about 100 images in our dataset, and it just underperformed during our inference testing.
We won’t go into the weeds here of training our model, other than to say we are using a pre-trained MXNet based model based on the Resnet50 convolutional neural network. It’s a thing-a-ma-jigger that enables us to do object recognition with images.
Again if you want to see how we manage the training job in SageMaker, just click the Deep Dive button below.
Training Deep DiveWe are now ready to use the labeled dataset in order to train a Machine Learning model using the SageMaker built-in Object Detection algorithm.
First we read in the list of annotated images, and randomly split them into a training set and a validation set.
Next, let’s upload the two manifest files to S3 in preparation for training.
We are ready to start the training job in the SageMaker console. You could do this manually, but why would you want to when you have a template? 🙂
Inferencing
Inferencing is the act of testing your model to see if it accurately “infers” the expected result. In this case to detect a dog, but only when it is pooping. Put in different terms, an inference can be defined as the process of drawing of a conclusion based on the available evidence plus previous knowledge and experience.
SageMaker provides an easy way to test your models using a variety of EC2 instances and GPUs. In the case of object detection with images, we simply feed SageMaker a bunch of test images, and it returns the images with bounding boxes drawn around the object it detected, as well as a label and a percentage of confidence.


As you can see the model did pretty darn good, but it did miss one very bad poodle. On the other hand, it did very well at not misinterpreting the sitting beagle. We won’t worry too much about this at the moment.
The details on inference in the notebook are in the Deep Dive.
Inferencing Deep DiveNow that the training is done, let’s test the model.
Next we create an endpoint configuration.
The next cell creates an endpoint that can be validated and incorporated into production applications. This takes about 10 minutes to complete.
Once the endpoint is up, we can load our test images, define our bounding boxes, and send the images to the endpoint for inferencing.
Deploying to DeepLens

DeepLens is a camera, a computer, and an IoT device all wrapped in one. From the dog detection project example, we learned we could capture and stream video to AWS Kinesis Streams, which allowed us to view and share video of Fido doing his dirty deed. In addition we can use AWS IoT Core via the MQTT or Mosquito protocol to report events in real time which we use to turn on the sprinklers.
In order to deploy our model to the DeepLens, we had to optimize and repackage it.
DeepLens Deep DiveBecause we trained a custom model in SageMaker, in order for it to be deployed “at the edge” to the DeepLens device, we needed to optimize the model. This is in part due to the fact that the DeepLens does not have the compute horsepower we are afforded in the cloud, as well as utilizing the device specific GPU for inferencing.
Optimization is a process of converting the model’s “artifacts” into a format the DeepLens can utilize. AWS DeepLens uses the Computer Library for Deep Neural Networks (clDNN) to leverage the GPU for performing inferences. As of the time of this writing, the Apache MXNet project removed the utility referenced in this article, so you must checkout branch v1.7x to access the deploy.py script. Additional references here.
GreenGrass (aka Lambda at the Edge)
DeepLens leverages a special Lambda function to inference images. This is a little counterintuitive because you can’t actually test your Lambda function in the cloud. Lambda is simply an IDE and deployment mechanism in this case. Of course you can go old school and edit your code with Vim on the device during development.
We used the object-detection example code as a starting point, and layered in the Kinesis code from the dog detector example, and finally the image optimization code from the native bird identifier.
IoT Sprinkler Controller

If the above wasn’t cool enough, this is perhaps one of my favorite parts of the project. Hearing that “crack” sound of an electrical load switch on from a JSON payload just makes my hair stand on end. Our tool of choice for simple workloads is an Arduino based controller, and the Wemos D1 Mini Pro is my favorite. This unit is extremely small, and cheap ($5) in comparison to an official Arduino, but be warned it has some nuances which mean it doesn’t “just work” out of the box.
Programming an Arduino can be as simple as downloading a program file from Github, to pulling your hair out because you really need to know some C/C++ foo such as typecasting, pointers, managing heap size, etc. For building a proof of concept, it’s mostly just cut and paste from example code.
In our case we used the Arduino MQTT library (aka PubSubClient) from Nick O’Leary, and ArduinoJSON from Benoit Blanchon. One important note is that AWS IoT Core’s preferred authentication mechanism is certificates, and there are several ways you can load certificates in Arduino. We chose to use SPI Flash File System (SPIFFS) which requires the FS.h library, and a file uploader plugin for the Arduino IDE.
There is a lot to go into just on the Arduino controller, so we’re going to save that for another article. You can subscribe below to get the updates.
Get our newsletter
Project Box

Of course we needed to protect our DeepLens from the elements, and in Santa Cruz California you just never know when the fog is going to roll in. Who knows how many days it was going to catch Fido in the act, much less prevent water damage from the sprinklers. Fortunately, our friends at the Idea Fab Labs (down the hall from our office) hooked us up with laser cutting of a cedar and acrylic DeepLens enclosure we designed.
Deploying The Poopinator™
After a few collective weeks of engineering, we were ready to school Fido on neighborhood etiquette, AI style. In reality, we were ready to deploy our platform and start fixing bugs. As you probably know, nothing ever works in production the way it did in the test environment.
Aside from configuring the devices for Doug’s wifi network, all that was left to do was connect our Wemos IoT device to the sprinkler controller. We were able to connect our device inline so that sprinklers still ran at their regular timed interval, yet still have unfettered access to the sprinkler solenoid on the front lawn.

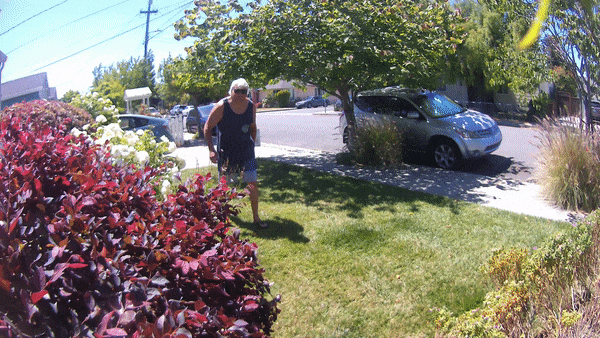
With the camera deployed, we started by testing the object-detection model provided by AWS, and ensuring video streams were being sent to Kinesis Video Streams. Doug was so accommodating, allowing us to use his front yard as the test bed. Even though we are friends, there’s just something creepy about controlling a camera at someone else’s house.
The Punishment Due
Of course you are waiting to see the video of Fido getting nailed by the sprinkler. Unfortunately this is a bit like taking your car to the mechanic, only to find out that squeak magically went away. We’re waiting for old Fido and we’ll post video here in the coming days.
A Practical Example
Now I’m sure you’re probably smiling ear to ear with this story, and if you are interested in owning your own Poopinator, or talking with us about ML/AI, reach out to us! If there’s enough interest in this kind of device, we might just produce a product.
In our current environment however, there’s perhaps a more “plaguing” example. (See what I did there?). Many businesses are struggling with public health rules imposed by a county health department near you. We’re talking about wearing a mask when entering local businesses.
We took our example a step further and are training a model to detect people not wearing a mask, or wearing the mask incorrectly. While we briefly considered soaking them with a sprinkler, we felt a more appropriate solution was to sound an audible alarm and perhaps a visible sign.

What’s Next
If you like what you read here, the Cloud Brigade team offers expert Machine Learning as well as Big Data services to help your organization with its insights. We look forward to hearing from you.
Please reach out to us using our Contact Form with any questions.
If you would like to follow our work, please signup for our newsletter.